After downloading and installing FileHopper from the App Store, the following screen will be displayed:
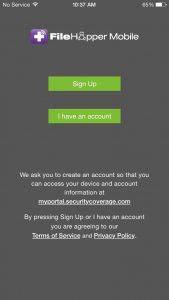
Press “I have an account” and the following screen will be displayed:
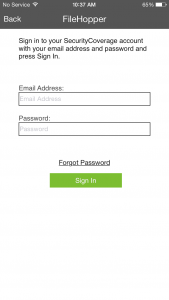
Enter the email address and password that you used to register this or other SecurityCoverage products, and then select “Sign In”.
If you cannot remember the password that you originally registered with, you can select the “Forgot Password?” link. An email will be sent to the email address that you registered with. The email will contain instructions and a link to change your password.
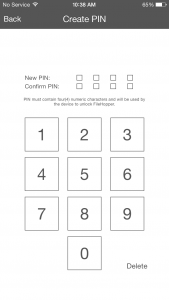
You will need to create a PIN, then reenter the PIN for verification, then press “Next”. The following screen will be displayed:
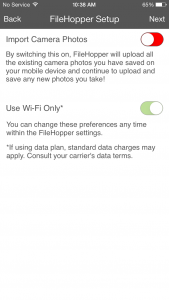
On this screen, you can select to enable the automatic upload of camera photos. If you enable camera photos, the “Use Wi-Fi Only” option becomes functional. If you leave the “Use Wi-Fi Only” default as enabled, the photos will upload only when you are connected to Wi-Fi, thus saving usage of your data plan. If you disable “Use Wi-Fi Only”, camera photos will upload regardless if you are connected via internet or your data plan. Select “Next” to continue.
If you have installed FileHopper on another device (either Android or iOS), and have performed a backup on that device, the following screen with appear:
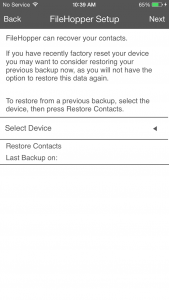
This screen also appears if you are reinstalling FileHopper on the same device. This allows you to restore your previous backup of Contacts to this device. If you do not wish to restore, simply press “Next”. To restore, first select the Device that you are restoring from by pressing on the arrow adjacent to “Select Device”. Select the device that you want to restore, then select Restore Contacts. You will receive a message when the restore is complete. Press the “Next” button to continue. The following screen will be displayed:

Here you will be able to set automatic backups. If you do not wish to set up backups at this time, simply press “Next” to continue. You may set up backups later in Settings within the app. If the auto backup is enabled ,you will then be asked to select if you would like the backup to occur on a Daily or Weekly basis. Press “Next” to continue. The following screen will appear:
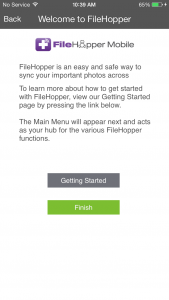
Press “Getting Started” to access the Getting Started Guide online. This will open an internet browser on your device to the guide.
Press “Finish” to complete the installation and registration process and begin using your FileHopper app.