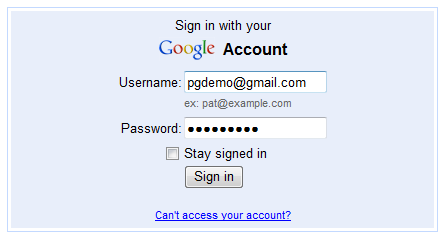
Once Password Genie is installed, simply use your browser and the Internet as normal. When you first visit a web site that requires a username and password, enter it directly in the form provided by the web site. Below is an example when visiting Google Gmail for the first time.
Browse directly to http://www.google.com/gmail. The following login form will appear on the page. Enter your Username and Password as normal.

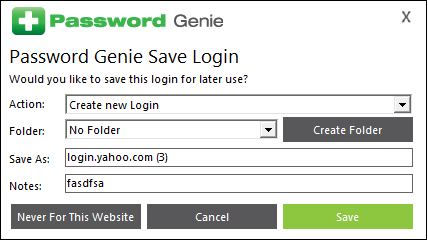
Once you click to sign-in to the page, Password Genie will automatically recognize this site and prompt you to create a new Saved Login as shown below.

Action:
Create new Login – When the Action is set to “Create new Login,” a new web site entry will be saved in your Information section of the console.
Replace existing Login – If you are updating an existing login with a new username or password you can choose to replace that previously saved login by clicking on the arrow button and choosing the appropriate Saved Login to replace.
Folder:
Folder – You can save your saved logins in no folder (default), into an existing folder by clicking on the drop-down menu, or you can create a new folder.
Create Folder – If you want to create a brand new folder and save your new login to it, you can click the “Create Folder” button and create a brand new folder.
Save As:
The “Save As” field allows you to enter a custom name for this login that will be shown in the Information section of the console. Password Genie will default to the root domain name of the web site.
Notes:
The “Notes” field allows you to enter description information for this login that will be shown in the Information section of the console. Password Genie will default to the username used when signing into the web site.
That’s all there is to it… Now the next time you visit a Password Genie saved web site requiring a username and password, Password Genie will automatically fill in the web site username and password according to your settings in the Information section of the console.


